Showing posts with label Food - Recipes. Show all posts

Thursday, August 28, 2008

My First Snowskin Mooncake


Life-post-allergy-discovery - I now have to learn how to make all my favourite foods in order to ensure I don't accidentally ingest anything that might make me sick.
This is one of the few recipes around that doesn't use milk / egg - and tastes just as good. (The commercial baked ones all use milk & eggs - and the snowskin ones - some do and some don't).
This recipe is adapted from Cheryl - the famous gal with those famous bakes. Her pictures look much better and she has even got some nice background as to the origins of mooncakes - so check out her post if you are keen.
Snowskin Mooncakes
Ingredients
115g Hong Kong Flour (steam for 15 minutes, leave to cool)
115g fried glutinous rice flour
210g icing sugar
1 tablespoon shortening
5 tablespoons cold water* I had to use 7 tablespoons plus a few more drops to make the dough wet enough.
1 teaspoon banana essence - I completely omitted this since I'm allergic to bananas anyway. I decided against using the store-bought pandan flavour cuz it smelt so..fake. I have since read somewhere that you could replace all the water in this recipe with pandan water.
2 tablespoons Hong Kong Flour (mix with 2 tablespoons hot water to form hot dough)
Fillings
1.5 kg lotus paste * I used up approx 1kg of it - since I only bought a 1kg pack from Phoon Huat.
100g melon seeds (baked) - as this was my first time, I decided to omit this - but have since realised that adding this would improve the texture significantly.
salted egg yolks (steamed) - can't be bothered with this - since I'm allergic!
Method
  • Sieve fried glutinous flour and Hong Kong flour, add in icing sugar.
  • Make a well in the centre, add shortening, water and hot dough, and knead until smooth.
  • Roll the dough and wrap lotus paste, press into moon cake mould.
  • Scale - if you are using the small size (which I used), scale at 29-30g for the filling, and 18-20g for the dough - just changed the ratio along the way in order to maximise the use of all the remaining ingredients - since Cheryl's original recipe doesn't give you any exact weight to go by.
  • Knock mooncake out from mould, chill and serve.

Notes
Cheryl scales hers at 1/3 total weight for dough and 2/3 total weight for filling, and Zu's recipe scales at something like 30g filling to 20g dough)

Thursday, August 07, 2008

Overkneaded Dough


All the cookbooks keep warning about not over-kneading dough, but I've never seen what that actually looked like. And I never knew if my own hand-kneaded dough was actually over-kneaded or under-kneaded.

Well, one fine day, I was attempting to make a 100% wholemeal bread, since I had managed to buy wholemeal BREAD flour.

Instead of trusting the fact that the BREAD flour would develop gluten beautifully, albeit speckled with the wholemeal bits, I put it through THREE rounds of the bread-maker kneading, making this a total of 1 hour's worth of machine-kneading.

At the 40-min mark, the dough had looked beautiful. Greedy for perfection, I hit the button for another 20 minutes worth of kneading - only to be greeted by this!

The bread that came out was flavorful, but well, it tasted like Little Pixie's teething ring.

Sunday, May 18, 2008

65C Tang Zhong Wonder Bread!


I chanced upon Do What I Like's blog by accident, and was amazed that there was indeed such a bread! With this, my family members can stop complaining about the bricks I keep serving them for breakfast!

This is the half-wholemeal version, and of course, ever since I was diagnosed with multiple allergies - I have made the necessary modifications.

Recipe
150g bread flour
100g wholemeal flour
110g water/milk or (30g egg + 80g liquid) ( I used all water)
3.5g salt
26g sugar
5g yeast (I used something like 1/2 teaspoon, you can use less if you have the time to spare)
60g tangzhong
26g butter (I used Spectrum's trans-fat free shortening)

Note about yeast:
I personally believe after reading all the classical bread books that too much yeast in the bread is good for neither us or the bread, so unless I'm using the bread machine, I usually use much less yeast than is called for in the recipe. I just compensate for this with a longer proof time. And more often than not, I've discovered that even after proofing for just a couple of hours using half the amount of yeast, the dough doubles quite nicely. It's probably due to our warm weather! (American & European "room temperature" is 21 deg C!!!)

Instructions
Knead like crazy. I kneaded it with my Philips handheld mixer for like 30 min till the mixer looked like it was going to go kaput. Even then, the dough was still sticky-feeling and the "dough window" refused to appear.

DO NOT add more flour.

I hand-kneaded for an extra 20 min and even then, the "dough window" didn't really appear satisfactory. I left it in a bowl and cling-wrapped it anyway.

Tin Hang Zai then asked me to go out, so I had to shove the entire thing into the fridge and when we came back 4 hrs later, to my amazement it had grown more than double. Since we were going out again (or was it bedtime, I can't remember), I punched it down (it felt so hard that it didn't seem to want to deflate at all), and put it back into the fridge.

The next morning, I was dismayed to find that the punched down dough had stayed...punched down!! It looked like a crumpled heap. I left it on the counter and as usual, forgot about it whilst I went about my household chores.

A couple of hours later, it had doubled nicely! Bake at 180 deg C for 25-35 min. I left it for 40 min and it was a tad dry. So I figure 30-35 min should do just fine.

Monday, January 21, 2008

"Baby" Risotto

I can't believe I made this! This looks exactly like a risotto, but it wasn't meant to look like this. Everything was rather "accidental". And it's unbelievably healthy. It's 90% vegetables, virtually fat-free, and you feel so full you won't believe there's hardly any meat in it (again, another accidental thing - I just didn't put in enough meat).
In fact, I think it beats those awful dishes I tried at the only organic restaurant I ever went to.
The original title of this dish is "Tasty Rice with Meat & Vegetables" and was taken from Annabel Karmel's cookbook for toddlers.
As usual, I modified it with whatever vegetables I had on hand, and everything was done "to taste".
Here's how I came to be dishing out these "accidental" dinners:
Lately, I have been getting very frustrated with having to make frozen dinners for Little Pixie, rush to feed, bathe and put her to bed before 7pm each night, and then rush to the kitchen to make dinner for Tin Hang Zai and myself. My main quibble was that if I made stir-fried greens for Little Pixie at 5pm, they would turn yellow by the time Tin Hang Zai reaches home each night at 830pm. Not to mention I have to wash dishes till 10pm each night thanks to this routine!

So I have been trying out these one-dish meals that just one-time cooking at 430pm, and then a 5 min reheat once Tin Hang Zai returns home late at night. 90% of the dishwashing is completed before 7pm. No more dishes to wash except for 2 serving plates, 2 sets of cutlery and a tiny pot.

This is one of them.
Directions (Original Recipe) (My modifications in Blue)
Rice
1/3 cup white rice (3/4 cups white short-grain Calrose rice (that's all I had at home!))
4/3 cup chicken stock (3 cups water)
1/2 red bell pepper, finely chopped (1 red and 1 green bell pepper - just felt like buying more at the wet market!)
1/2 cup peas, fresh or frozen (no peas at home, just lots of supersweet frozen corn)
Others
1/2 onion, finely chopped (used 2, because we love onions)
1 carrot, finely chopped (skipped, used leftover shitake mushrooms which I'd soaked for another dish but hadn't used)
1 cup lean ground beef (used pork slices cut up finely with scissors, cuz that's all I had in the freezer, seasoned generously with salt)
1/2 tablespoon ketchup (Just poured in as much as I felt like it, plus some Prego's Pasta Sauce)
a few drops Worcestershire sauce (just poured in as much as I felt like it)
Oil for sauteing
Spring onion (my favourite vegetable seller gave me lots this morning) - this is what gives the dish a bright cheery green because the green pepper loses its bright-greenness after prolonged cooking.
Directions
  • Put rice into saucepan, cover with chicken broth. Bring to boil, cover & simmer for 15 min (please monitor carefully, my rice sputtered all over the stove!)
  • Add red bell pepper and peas and cook, uncovered, 6-7 min, or until rice is tender and no liquid left (ditto above - but I had to add salt to the rice and some Prego's sauce at this stage to give the rice a bit more taste)
  • Meanwhile, in a separate saucepan, saute onion and carrots in a little vegetable oil for 5 min. Add ground meat & cook, stirring, till browned. Stir in ketchup and Worcestershire sauce and cook over gentle heat for 10 minutes.
  • When ready to serve, mix desired amount of rice & meat and cook over gentle heat for 3-4 min.
  • Cut up spring onion into small bits and mix into rice just before serving, for unsuspecting guests
  • Freeze the rest.

Saturday, January 05, 2008

I miss Hong Kong Food!!!


The one thing I really miss about the holiday is eating at this very tiny but cheery, orange-hued Cha Can Teng called the Happy Kitchen. What attracted us was the owner's claims that their street fare had no MSG.

And did we keep eating there for our 5 day stay! Everything I ate there was fantastic!!! And if you knew just how critical I am about food, you'd want to go there too!

There was a dish which stuck in my mind, but no search on the Internet would find me any recipes for anything remotely labelled "Hong Kong cuisine". Back home, I could not stop thinking about the Curry Beef Ramen I ate at that fantastic shop! (it's so tiny, their shop space is probably the size of my study, not a very big space).

I found a useful substitute at Happy Homebaker's Blog , and this is what I also used. Of course this dish above looks very gross compared to hers - it's not the Curry Beef Ramen I fantasized about, but a last-minute throw-together using S & B curry sauce mix from Cold Storage, potatoes, carrots, fresh shitake and onions, to be eaten on rice. It was good, but I think I'll try making my own sauce next time. Better still, it doesn't cause any fumes in the kitchen - where my laundry hangs. Definitely a keeper. (Meantime I have conveniently downloaded the remainder of the curry sauce to the Veterans).

Monday, December 31, 2007

My Cheesecake Cracked & Cheese Cupcakes Exploded!!

It was Little Pixie's 2nd birthday. I had wanted to make little muffin-sized cheesecakes with an Oreo cookie each for the base - using a no-bake recipe by Annabel Karmel (and inspired by some suggestion in David Tutera's Party Planner on Discovery Travel & Living), and the classic New York-style (this is my 5th run) to give away.


Airport was kind enough to help me out as the cleaner lady was coming and unlike half a year ago, Little Pixie is now old enough to be interested in a career as a baking assistant. She watches and tries to get involved as much as she can.

So Airport did all the mixing, pouring, and cleaning up - all I did was interprete the recipe & give out instructions.

Unfortunately, I made a crucial error in the no-bake version - as you can see. After many hours, it had still not set - and in desperation, I put one of the 3 trays I made into the oven. Well, the cheese-cupcakes-with-Oreo-base puffed up nicely, exploded and then collapsed all over my oven!!
A separate version had all the Oreos floating up into the cheese batter!
Of all the cheesecakes I have made, only the first one seems to be crack-free. And get this: I baked the first one in a blur, before consulting all those expert books on how to get the perfect crack-free cheesecake and baking the subsequent ones.
I am still mystified as to what caused all my subsequent attempts to crack!

Thursday, December 13, 2007

Easy-Peasy Foccacia


You won't believe how easy this is. This is from Suzanne Dunaway's "No Need to Knead: Handmade Italian Breads in 90 minutes".
Ever since I'd had the allergy attack, I'd been unable to eat wheat, and resorted to using wholegrain spelt flour. Bakers will know that using wholegrain flours can make the end-products heavy and dense, but this was GOOD!!!

For every 2 cups of flour , do the following:
- Dissolve 1 tsp of active dry yeast in 1 cup of lukewarm water in a large mixing bowl (large enough for the total amount of flour you intend to use).
- Stir till completely dissolved.
- Add in half the amount of flour, plus 1 tsp of salt. Stir well, for 2 minutes.
- Add in the remaining flour, stir for at least two minutes, until the flour 'comes together' and pulls away from the sides of the bowl.
- Cover bowl with cling wrap, and place into refrigerator overnight (for at least 8 hours). If you wish to skip this step, you could let it rise at room temperature, for a shorter time.
- 2 hrs before baking, take the bowl out, and let it double in size (the dough, I mean).
- Preheat the oven to 500 deg F.
- Once the dough has doubled in size, carefully pour the batter onto a non-stick, greased baking sheet.
- Use your fingers to make dents in the dough.
- Brush the top with olive oil and sprinkle with herbs and coarse salt.
- Place sheet into oven - and immediately turn down temperature to 450 deg F.
- Bake for 15-20 min, until golden brown.
YUMMY!!! (Tin Hang Zai and Little Pixie love this)

Monday, December 03, 2007

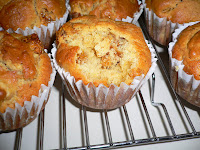
Dried Fig Muffins

I really have to thank Happy Home Baker for this recipe on her blog.

Ingredients:(makes 12 muffins)
  • 375g dried figs
  • 90g unsalted butter
  • 250ml apple juice
  • grated zest of 1 orange (omitted due to laziness)
  • 315g plain flour
  • 2 1/2 teaspoons baking powder
  • 1/2 teaspoon salt
  • 125g granulated sugar
  • 60g dark brown sugar (simply used all demerara sugar, all that's left in my pantry)
  • 2 large eggs, lightly beaten
  • 1 1/2 teaspoon vanilla extract/essence

Method:
Remove the stem and cut dried figs into quarters.
Heat apple juice and butter in a saucepan over low heat until the butter is melted.
Remove from heat and add in the figs and orange zest. Leave to cool until the figs are softened, about 1 hour.
Preheat oven to 190 degC. Grease muffin cups with butter or line with muffin liners.
In a mixing bowl, stir together the flour, granulated sugar, brown sugars, salt and baking powder.
Make a well in the centre and add the cooled fig mixture, eggs and vanilla. Stir until just combined. Do not overmix, the batter will be slightly lumpy.
Spoon batter into muffin cups, filling to the rim of the cup.
Bake for 20 ~ 25 mins, until golden, and toothpick inserted into the centre comes out clean. Transfer muffin pan to cooling rack and let cool for 5 mins. Unmold the muffins and let cool completely.

Verdict
The muffins taste extremely exquisite - Tin Hang Zai & Little Pixie & the Veterans finished the whole bunch, together with his colleague Flower - even though he's completely irked by the idea of eating these strange-looking things by themselves.

Cookie Making with Gremlin

It's been a long while since I've last blogged - lots have been happening on both sides of the extended family, and I've been sick with allergy for more than a month.
8-year-old Gremlin is here from yesterday (ok, sorry for the bad grammar) till tomorrow. (Phew!!!)


He belongs to the "me-me-me" generation. In his world, things get tidied up by invisible house-elves (you know, those things that wear pillow-cases in Harry Potter movies), and these are the ones that clear up after him when he eats, drinks or messes up the place, whatever.

I've realised that these "Me" kids really expect to be entertained all the time. And I mean, ALL.THE.TIME. They are quite incapable of self-entertainment. Then again, what do you expect, when they've been brought up on a daily diet of 8 hrs of TV, doing nothing but waiting for the next show to make them laugh??

I really believe that TV deadens the mind.


I have to say I wasn't too pleased about being his house-elf for these 2 days. Look at the products, and try to imagine the hours spent cleaning up.

P/S - besides those featured here, we made another batch of Baking 911's Chewy Chocolate Chip cookies which had me washing up till 11pm at night!

The recipes were from Nigella Feasts 'Fun Foods' episode. I must say, I was impressed by their simplicity and ease!

Cut-Out Cookies
Ingredients
  • 1/3 cup / 90g butter
  • 1/2 cup /100g sugar
  • 1/2 tsp vanilla
  • 1 egg
  • 1 1/2 cup / 200g flour
  • 1/2 tsp baking powder
  • Pinch of salt

Instructions

  • Cream the butter and sugar, adding the vanilla when fluffy.
  • Add 1 tblspn of flour, before breaking the egg into the bowl.
  • Continue the creaming, and gradually add in all the flour, a tablespoon at a time, baking powder and salt.
  • Get the dough into a ball, add more flour if desired.
  • Cover with cling wrap, and chill for half-hour. (I didn't bother sticking to the half-hour, I went jogging and then took a walk to West Mall before continuing).
  • Preheat oven to 350 deg F / 180 deg C.
  • Shape with cookie cutters.
  • Bake for 10 min (I had to bake them for 15 min) to desired colour.

Tin Hang Zai preferred the more browned version (15 - 20 min) whilst Gremlin preferred the pale-looking cookies that were baked for only 12 min.

Icing

  • 1 1/4 cup / 150 g icing sugar
  • 2 tblspn hot water
Mix, and colour as desired. You need to buy only the primary colours (red, yellow, blue) - the rest can be made from these 3.

Creative Input
  • Get from the gremlin or whoever you are baking with.
  • Obviously if you are the house-elf, you are going to be too tired to have any creative juices flowing out of you at 11pm at night!

Tuesday, September 18, 2007

This is what real grape juice looks like


Airport juiced a bunch of grapes which looked like Red Globe but didn't have seeds. Compare the rich colour and cloudiness with the processed, additive-rich, preserved juice-like drinks you find in the supermarket shelves!

Kenny Rogers Corn Muffins


Kenny Rogers Corn Muffins

Ingredients:
1/2 cup butter
2/3 cup sugar
1/4 cup honey
2 eggs
1/2 teaspoon salt
1 1/2 cup all-purpose flour
3/4 cup yellow cornmeal
1/2 teaspoon baking powder
1/2 cup milk
3/4 cup frozen yellow corn

Directions:
Preheat oven to 400 degrees. Cream together butter, sugar, honey, eggs and salt in a large bowl. Add flour, cornmeal and baking powder and blend thoroughly. Add milk while mixing. Add corn to mixture and combine by hand until corn is worked in. Grease a 12-cup muffin pan and fill each cup with batter. Bake for 20-25 minutes or until muffins begin to turn brown on top.

Verdict
The Goose said that of all the muffins that I did up till this time (she hasn't tasted the banana ones or Nigella orange ones yet) - this was the best. However, I would use real cornmeal (I substituted this one with my organic coarse cornmeal which made the muffin crunchy.) - because I felt that this one tasted more like a honey muffin than a corn muffin.

Monday, September 17, 2007

Awesome Banana Muffins!

Good Ol' Banana Muffins
I must say that I have never been a fan of banana-stuff because it's considered too "cooling" for my constitution in TCM. Plus, I do not have a sweet tooth.

My ultimate food fantasy is a mountain of keropok, not some sweet dessert. Most of the stuff I make or bake is for Tin Hang Zai or Little Pixie or friends or family. However, these muffins were so good that I could not resist finishing a couple for myself.

I let MZ try some, and she said they were good enough to sell!! (MZ is a self-confessed picky eater who has very high standards for desserts).

As usual, this recipe is from a pretty reliable source - the Joy of Cooking. Check out a similar recipe here. These days, I try to stick to tried-and-tested chefs rather than odd recipes scrounged from the Internet - the results are far more consistent if you stick to a chef, IMHO.

Recipe:
Dry Ingredients:
1 1/2 cups flour (I used unbleached organic flour from NTUC)
1/2 whole wheat flour / wheat bran (I used leftover wholegrain spelt flour)
2 tsp baking powder
1/2 tsp baking soda
1/4 tsp salt
1 tsp cinnamon (of course I was too lazy to add)
1/8 tsp nutmeg (of course I was too lazy to add)
2/3 coarsely chopped walnuts (omitted so that Little Pixie could enjoy it)

Wet Ingredients
1 large egg
3/4 cup packed brown sugar (I didn't bother to pack, and used only 1/2 cup)
2-3 mashed ripe bananas - I used 3 ripe, Del Monte ones
6 tblspn vegetable oil (I substituted with melted butter - cuz I had extra)
1 tsp vanilla.

Mix according to the usual Muffin method. Baked in a preheated oven at 375 deg F, for about 15-18 min. Makes 12. Rack should be in centre of oven.

Thursday, July 19, 2007

Foolproof Cheesecake!

Side View

Isometric View
This is from Annabel Karmel's Feeding Your Baby and Toddler.
It's unbelievably easy.
Ingredients
Base
  • 250g digestive biscuits (I used Marie, don't try Jacobs, the taste is just odd)
  • 125g butter
  • 60g caster sugar (optional - this is an addition from the Phoon Huat class I attended)
  • 60g honey (optional - this is an addition from the Phoon Huat class I attended)

Filling

  • 225g caster sugar (as usual, I replaced with brown sugar)
  • 3tblspn cornflour
  • 675g cream cheese (from Phoon Huat)
  • 2 eggs
  • 1tsp vanilla essence
  • 225ml whipping cream
  • 75g sultanas

Here's how:

  • Preheat oven to 180C.
  • Crush biscuits, melt butter, and mix with honey and sugar (if used).
  • Line a 9-inch springform tin with baking paper and GREASE the sides Note: If using a different-sized pan, please reduce the batter accordingly, else results might differ. Greasing is compulsory - else your cake might crack in the middle while baking.
  • Pack the crumbs into the tin - and chill for at least half-hour (or freeze 15 min). I used a potato-masher to pack.
  • To make the filling, mix the sugar and cornflour, and then beat in the cream cheese till smooth.
  • Add the eggs and vanilla essence. Beat till smooth.
  • Slowly whisk in the cream until mixture thickens slightly. Stir in sultanas, if using.
  • Pour into cake tin. Bake for 1 hr.
  • Chill overnight before eating.

Reviews:

Tin Hang Zai's colleagues loved this. Koala and her mom and sis did too!

Saturday, July 14, 2007

Nigella's Lovely Chocolate Muffins

Nigella's Chocolate Chip Muffins
  • 250g plain flour (roughly one cup)
  • 2 teaspoons baking powder
  • 1/2 teaspoon baking soda
  • 2 tablespoons best quality cocoa
  • 175g caster sugar
  • 150g chocolate chips (plus more for sprinkling later - I was lazy and didn't bother to sprinkle any)
  • 250ml milk
  • 90ml vegetable oil
  • 1 large egg
  • 1 teaspoon real vanilla extract

Preheat the oven to 200C and fill a 12-bun muffin tray with paper cases. Weigh out the dry ingredients into a large bowl. Pour all the liquid ingredients into a measuring jug. Mix both together – it will be a runny batter - then spoon into waiting muffin cases. Sprinkle more chocolate chips on top then cook for 20 minutes or until the muffins are risen and springy. Makes 12.
These turned out very nice - as nice as the orange ones. Remember not to over-mix! And, less milk may help - makes the batter more lumpy and supposedly lighter.

Friday, June 08, 2007

Awesome Banana-Nut Bread!


I've made many of these quick breads before but they were all badly risen and generally blah. (I got all those from Allrecipes)

This is just awesome. I got this from The Joy of Cooking, lovingly given to me as a wedding gift by the 2 Women-of-God that I look up to most - beautiful middle-aged-but-forever-young-and-joyful Bamboo Poles. And this is the very 1st time I'm using this after 5 long years!!

Awesome! Soft and just right, not too sweet and not too salty!
Now, to wait 24 hrs and see if they remain soft....


Bingo!! They do!

Thursday, May 31, 2007

Marvellous Soft Muffins - I DID IT!!!!

Honestly, after umpteenth failed attempts, I had about given up. But then, Cat Angel introduced me to this recipe from Nigella.
  • 75g unsalted butter
  • 250g self-raising flour
  • 25g ground almonds
  • half teaspoon bicarbonate of soda
  • 1 teaspoon baking powder
  • 75g caster sugar (I just used brown sugar)
  • zest of 1 orange (omitted)
  • 100ml freshly squeezed orange juice (I used Ceres packet)
  • 100ml full-fat milk (I used my home-made brown rice milk)
  • 1 egg
  • 12-bun muffin tray lined with 12 paper cases
Preheat the oven to 200 deg C. Melt the butter and set aside. Combine the flour, ground almonds, bicarb, baking powder, sugar and orange zest in a large bowl. Measure the orange juice and milk into a jug and whisk in the egg and then the cooled, melted butter. Now pour the liquid ingredients into the dry ingredients, mixing with a fork as you go. The batter will be lumpy but that's as it should be: you want everything to be no more than barely combined. If really too dry, add another tablespoon of milk or orange juice (I did). The whole point of muffin mixture is that it must never be overworked. Spoon out the mixture equally into the muffin cases and cook for 15-20 minutes. Remove, in their paper cases, to a wire rack and let cool slightly (but not completely) before devouring.Makes 12.

This is the VERY FIRST TIME my muffins have turned out non-hard!!!
P/S Tin Hang Zai says it's not sweet enough for him - but it was for me - and this is supposed to be eaten with jam.

Wednesday, May 16, 2007

Healthier Scruffy Murphy's Breakfast

Nowadays, Scruffy Murphy's is too far for our comfort, and the last breakfast we tried at Breko's was just awful.

My last attempt at this was using AMC - and I thought the luncheon meat looked so gross. So I'm so happy that this attempt turned out so nice - using the Goose's seasoned Chinese wok.

The recipe is a no-brainer. Heat wok. Pour oil in. Cook everything. Salt, to taste. Oil, to taste.

Monday, May 14, 2007

MILO Godzilla

Pixieville hosted another Prison Group gathering last Friday.

We were extremely honored to have Mr Timberlake grace us with his presence. Sans paparazzi. I decided that Timberlake reminds me very much of Lau Ching Wan. So Lasik, it's Timberlake-Ching Wan. :)

I made everyone Tin Hang Zai's trans-fat free version of the McDonald's milkshake. Despite using stuff like corn oil, REAL milk, and non-stick cooking spray, Timberlake-Ching Wan and Lasik felt it tasted like a sorbet, and more specifically, a MILO-Godzilla!!!

I still can't figure out what caused the sorbet-texture.

Tuesday, May 01, 2007

Easy-Peasy Scones are Easy

Recipe:
225g self-raising flour (sorry, this was from a UK book)
50g butter
150ml milk (lactose-intolerant - I substituted with home-made brown rice milk)
1 pinch salt (can be more)
1 tblspoon baking powder
Any amount of dried fruit or cheese you like - I used raisins.

Preheat oven - 180 deg C
Sift dry ingredients (if you don't know which are dry - you'd better not bake at all)
Rub in butter (learnt in Sec 2 Home Econs)
Add in milk gradually, stirring with knife until mixture comes together.
Knead lightly, roll out to 2cm thick and divide into 9-10 portions
Bake for 12-14 min (I think I ended up baking them for half hour).

Little Pixie just loved them. Tin Hang Zai said they tasted good with cream cheese. They are my first baking success - my muffins are still cookie-like.
eXTReMe Tracker